序
2020年4月17日凌晨vue3.0 beta 了。
项目初始化
安装vue-cli
1
npm install -g @vue/cli
安装完使用vue -V可以看到我的版本是@vue/cli 4.3.1的.
创建项目
1
 vue create vue-3.0.0-beta.1-demo
输入完命令会出现交互的弹窗,我一次选的是:
Manually select features- 第二项我勾选了Babel、Router、CSS Pre-processors、Vuex、Linter/Formatter
后面根据大家的需求都是些Y/N的选项可自己选择下。
最后回车后自动安装依赖,我在这里就卡到下面这个界面了。
 卡在这里我一开始以为是没有使用淘宝源所以很慢,所以为了加快安装依赖,我使用淘宝源加快初始化项目。
1
vue create -r https://registry.npm.taobao.org vue-3.0.0-beta.1-demo
结果还是卡在这里不动,所以排除npm源的问题,于是又看了下我的node版本
node/12.16.2,于是通过node版本管理器n切换到node/10.20.1, 重新尝试初始化项目,很快项目就创建完毕了。
升级3.0
由于vue-cli没有直接支持创建3.0项目,所以需要通过插件升级,我们输入指令:
1
vue add vue-next
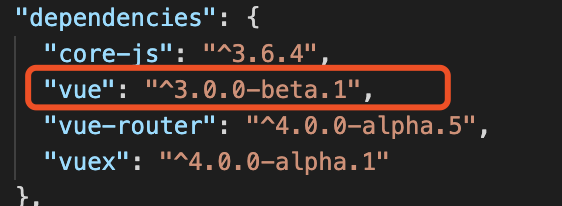
安装完成后会发现vue的版本已经是3.0.0-beta.1,vue-router和vuex也都升级到4.0的版本。
启动项目
1
 npm run serve
3.0初体验
首先创建个页面路由,和2.x并无差别。
1
2
3
4
5
{
  path: '/test',
  name: 'test',
  component: () => import(/* webpackChunkName: "about" */ '../views/test.vue')
}
然后在test.vue里面把官网给的基本示例拿过来
1
2
3
4
5
6
7
8
9
10
11
12
13
14
15
16
17
18
19
20
21
22
23
24
25
26
27
28
29
30
31
32
33
34
35
36
37
38
39
40
41
42
43
44
45
46
47
<template>
  <div ref="root">
   <button @click="increment">
    Count is: , double is:
   </button>
  </div>
</template>

<script>
import { ref, reactive, computed, watch, onMounted, onUpdated, onUnmounted, getCurrentInstance } from 'vue'

export default {
  setup() {
    const state = reactive({
      count: 0,
      double: computed(() => state.count * 2)
    })
    const { ctx } = getCurrentInstance()
    console.log(ctx.$router.currentRoute)
    const userName = computed(()=>ctx.$store.state.userName)
    console.log(userName)
    function increment() {
      state.count++
    }

    watch(() => state.count, val=>{
        console.log(`watch:${val}`)
    })
    onMounted(()=>{
        console.log('mounted')
        console.log(root.value)
    })
    onUpdated(()=>{
        console.log('updated')
    })
    onUnmounted(()=>{
        console.log('unmounted')
    })

    return {
      state,
      increment,
      root
    }
  }
}
</script>
setup
- 调用时间:创建组件实例时,在初始道具解析后立即调用。在生命周期方面,它在beforeCreate挂接之前被调用。
- 模板使用:可以看到
setup返回的state对象和方法被合并到组件模板的渲染上下文中
computed
代码中可以看到计算属性computed是一个方法,里面包含了一个回调函数,当计算属性返回结果是会自动获取返回的结果
watch
同样也是一个方法,它包含两个参数,第一个参数是要监听的值,第二个是触发监听器的回调函数。
生命周期
官网给出的2.X生命周期和Composition API之间的映射:
beforeCreate->使用 setup()created->使用 setup()- beforeMount -> onBeforeMount
- mounted -> onMounted
- beforeUpdate -> onBeforeUpdate
- updated -> onUpdated
- beforeDestroy -> onBeforeUnmount
- destroyed -> onUnmounted
- errorCaptured -> onErrorCaptured
获取路由
上面例子中,我用了getCurrentInstance获取了当前组件的实例,然后ctx获取当前实例的上下文,ctx.$router拿到
Vue Route实例,里面的currentRoute里有当前路由的信息。
vuex相关
- 首先定义vuex和之前并无差别,在src/store/index.js中定义
1 2 3 4 5 6 7 8 9 10 11 12 13 14 15
import Vuex from 'vuex' export default Vuex.createStore({ state: { userName: 'zack' }, mutations: { setUserName(state, value){ state.userName = value } }, actions: { }, modules: { } }); - 在test.vue使用vuex中定义的userName,通过计算属性
computed和当前实例ctx可以获取到vuex中定义的userName1
const userName = computed(()=>ctx.$store.state.userName)
- 更新vuex状态也是和之前一样使用
commit去更新1
ctx.$store.commit('setUserName', 'zengkaiz')